Unordered List

Showing posts with label Help And Support. Show all posts

Sunday, July 7, 2013

911 Attack on Notepad


                       image

      Now the World Trade Center attack can be seen on a simple Notepad file. Let’s begin this trick with the bit of information – The flight number of the respective flight that hits twin tower was Q339.  However,  new notepad versions change it recently. So you have to change 9 to N.


Let’s Try,

   1) Open a new notepad file.

   2) Type Q339        Write N instead of 9 in latest versions

                    image

                      image

3) Increase the font size to 72

4) Change the font type to “Wingdings”

Enable GodMode in Windows 8


There is a simple way to access a hidden "God Mode" in Windows 7,Vista and in 8.If you want to Enable GodMode in Windows . Just create a folder on the desktop and name it whatever you like. After that, select Rename. Now just add the following to the end of the folder name:

like:

    All Settings.{ED7BA470-8E54-465E-825C-99712043E01C}


                  image


When you do this, the icon on the folder changes into one that is exactly the same as the Control Panel.

                   image


However, if you click on the new GodMode icon, you’ll get a folder with a bunch of links to all kinds of settings on Windows 8. It’s nice because it even breaks it down by category.

  image

Load Your Menu Faster on windows(xp,vista,7,8)


Go to Start then Run

    image

Type 'Regedit' then click 'Ok'
Find "HKEY_CURRENT_USER\Control Panel\Desktop\"
Select "MenuShowDelay"

        image
Right click and select "Modify'
Reduce the number to around "100"

       image
This is the delay time before a menu is opened. You can set it to "0" but it can make windows really hard to use as menus will open if you just look at them - well move your mouse over them anyway.

Start your Windows 8 in Safe Mode with networking


Start Windows 8 in Safe Mode with networking
1. Press the Windows key    + C, and then click Settings.

             image

2. Click Power, hold down Shift on your keyboard and click Restart.

              image

3. Click Troubleshoot.

             image

4. Click Advanced options.

          image

5. Click Startup Settings.

          image

6. Click Restart.

            image


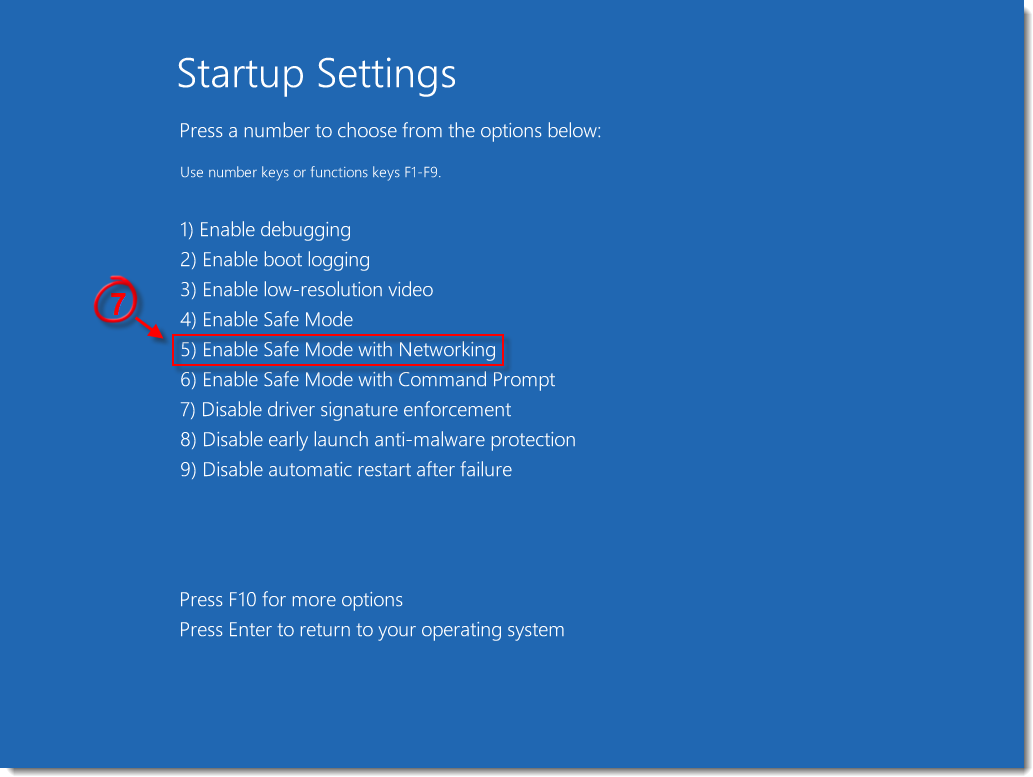
7. Press 5 on your keyboard to Enable Safe Mode with Networking. Windows will start in Safe Mode with Networking.  

            start Windows in Safe Mode or Safe Mode with Networking

Wednesday, July 3, 2013

Troubleshooting Common Network Related Problems


This demonstration shows how to resolve common network related problems.


  •      Open a command prompt and run the following commands:.

                      clip_image002[4]


Command
Result
*                  Ipconfig /all
Display all network connections for the computer and adapter configurations.

*                  Ipconfig/displaydns
display the contents of the DNS cache.

*                  Ipconfig /flushdns
clear the content of DNS cache.

*                  Ping
the local host.

*                  Ping
the domain controller by using IPv4 address.

*                  Pinging
the domain controller, verifies          connectivity to domain controller by using local host name

*                  Nslookup –d2 domain controller
Provides detailed information about the h
ost name resolution.


     image

Set Permission and Advanced Option for the Printer


1. Open the control Panel and click view devices and printers.

2. Right click on the printer and select Printer Properties.

3. Select Edit option in the Security tab and then type Contoso\IT as the user to assign

Permissions to.

4. In the list of permission, assign the ability to Manage Printers and to Manage Document.

5. In the Advanced tab, select the Hold mismatched documents option. Review the other print

options available on this tab.

6. In the General tab, in the Location field, type the name of the location where the printer resides

7. Click Preference, and in the Printing Shortcuts tab, set Print Quality to Best.

Review the other printing preference.

Configuring an IPv4 Address manually


1. Open Network connection. Right click on local area connection, select properties.

2. Open the TCP/IPv4 properties window.

3. You can configure the IP address, subnet mask, default gateway, and DNS servers in this window.

4. Open the Advanced TCP/IP setting window. Here you configure additional setting such as

additional IP address, DNS setting, and WINS servers for NetBIOS name resolution.

      clip_image002[8]