Unordered List

Sunday, May 13, 2012

How To Make A Banner To Your Website With html Code

Basic code

I would first suggest you set it up so that you can run your banner off of their site. If your banner is being run on their pages, from your server, there are a ton of things that can go wrong. But if you are running your banner on their pages, off of their server, there are still things that can go wrong, just not as many.

Don't get fancy with the code. Don't try to run an applet or any fancy image flip deals. Simple is easiest. Here's the basic code. I feel this is sufficient.


<A HREF="www.yoursite.com/yourpage.html">
<IMG SRC="banner.gif" BORDER="0" WIDTH="468" HEIGHT="60" ALT="Come to my page!">
</A>


But a lot of people like the onMouseOver look where text pops up in the status bar. I think it's a bit much and might cause problems, but here it is before you ask.


<A HREF="www.yoursite.com/yourpage.html" onMouseOver="window.status='TEXT IN STATUS BAR'; return true">
<IMG SRC="banner.gif" BORDER="0" WIDTH="468" HEIGHT="60" ALT="Come to my page!"></A>


Create free banners online

Create free banners online easily for your Myspace, Youtube, or just about any otherwebsite! Make your own banner and get the html code to display it on other ...

Click Here

Create your own banner at mybannermaker.com!
Copy this code to your website to display my banner!

Untitlesd


Follow the instruction and save the html code. It can be used for promotion of your website.

Saturday, May 12, 2012

Add Blogger Blog to Google Webmaster Tools

Nobody can deny that Google is the best search engine. As google is used by most users so it is a great way to get new visitors to your blog.
Adding your site to google webmaster tools increases your blog’s visibility in search engines which means more traffic.

Here’s how you can add your blog to google webmaster:


1. Verification:

You can verify blogger blogs by adding a meta tag to your blog. But you can verify your blog without any coding. Just sign in to your blogger account and then in the bottom of your dashboard you will see a link to google webmaster tools as can be seen in the following image:


Verify your blogger blog for google webmaster Add Blogger Blog to Google Webmaster Tools


Verify Your Blog

This will verify all of your blogs on account. You can always delete the blogs you don’t want to add to google webmaster tools.

2. Add Sitemap

Sitemap is simply like a map of pages in a blog. It lists all the URLs for a site along with their metadata. It is any easy way to inform search engines about pages in your sites. This can be used for other search engines like yahoo and bing as well.

Login in to your Google Webmasters account, then click on Sitemaps


submit sitemap Add Blogger Blog to Google Webmaster Tools


Add the following code in the box as shown in the image:

atom.xml?redirect=false&start-index=1&max-results=100

You can replace 100 in the code if you have more than 100 posts. Replace it by any value which is much greater than your total number of posts. So if you have 200 posts then you replace 100 by 500.

Click on submit sitemap and it’s done.

Tuesday, May 8, 2012

Get More Like For Facebook Posts

You can get about 3000 likes for posts and photos ..... Click here 


Untaitled


Get a token number after run this application, Click Step 1 

After That  you will get a url like  https://www.facebook.com/#access_token=AAAAAAIo4oJoBAFLvZCB5tOZAPtZBLp5ZAQNwmts8UQiUxF7mswo6Q6ZCR1psqhKGlOh0ZCQVZBYe7CCSKAbHLnmwj4iUy9l556J0dWwgB1fZA9vZBdoGi6E2A&expires_in=5160

Red color is your  Token

Then Goto : www.likehoot.com

Untaitled

Uantaitled


Insert post id/Photos for likes


Example copy the url of post like: https://www.facebook.com/abhishek.luthra.crazyupload.info/posts/398786370142973
And post id is 398786370142973

and if you want likes on photos: https://www.facebook.com/photo.php?fbid=335024379852506&set=a.270151856339759.75824.100000348412179&type=1
Photo id will be 335024379852506

Subscribe both updates  . Then submit your Facebook url which you have get more like.

See the instruction


Automatically publish Blogger content to your Google+ profile


1. Go to blogger account..

2. Head over to setting and post and comments

googleplus+setting


3. See “share on Google” and select yes for it.


googleplus+share

Whenever you will publish a new post it will ask you to share or not just press share and you are done.

How To Publish Blogger Posts Automatically On Facebook Fan Page


how-to-add-blogger-to-facebook-page


1. Log in to your Facebook account.


2. Now go to RSS For Pages App and click Install.

3. Now choose the page on your want to publish your blog posts.


4. Now click Add RSS For Pages and allow (Install) the app on your Facebook.


5. Write your website's title in Company Name field and write your Contact Number and check the box of Terms and Services, then press Save Changes.


6. Now write your Blog's feed address and choose the settings according to your need and press Save Changes.

Note: It may take time to start publishing your posts to your page. So please be patient to let the app settle your process.

Saturday, May 5, 2012

How to Resize Blogger Header to Logo Size

One of the drawbacks of Blogger is its header. When you are using text as your blog title, you will find that there is no problem but when you add an image or logo to the header portion instead of title and description or having description placed after the image from Layout > Page Elements tab, you will find that it’s not the logo but the whole header becomes clickable. So in this tutorial we will find out how to resize the Blogger header in new templates from template designer.

aaaaad


  Step 1: Make yourself a logo or image in any photo editing software with a particular size and note down its width and height and upload it to your image hosting site. In this tutorial, I will use my logo with 200 pixels in width and 35pixels of height and Blogger’s default template from Picture Window(2nd one).

Step 2: Go to Design > Edit HTML tab and backup your template.

Step 3: Find ]]></b:skin> and before it add the following CSS:

.header-left{
display: inline-block;
height: 35px;
width: 200px;
float: left;
}

Replace the bold pixels with your image’s height and width and increase or decrease the margins to position your logo. Changing “float: left;” to “float: right;” will change the position of the displayed logo, whether you want it to float to left or right.

Step 4: Find for the below codes and emphasize on the bold snippets:

<div class='fauxborder-left header-fauxborder-left'>
<div class='fauxborder-right header-fauxborder-right'/>
<div class='region-inner header-inner'>
<b:section class='header' id='header' maxwidgets='1' showaddelement='no'>
<b:widget id='Header1' locked='true' title='Blog's Title (Header)' type='Header'/>
</b:section>
</div>
</div>

Replace the bold snippet with:

<b:section class='header header-left' id='header' maxwidgets='1' showaddelement='no'>

As you can find out that an extra class, header-left has been added, highlighted in green. If you want then you can add this class, as shown above, without replacing the whole snippet.

Now “Preview” your template, you will find that the background color of Blogger’s header is not visible or it's missing.


aaaaad


So you need to add some more snippets to bring it back. So find for closing div (highlighted in red) and before it add:

<div style='clear:both;'/>

So the whole code will look like:

<div class='fauxborder-left header-fauxborder-left'>
<div class='fauxborder-right header-fauxborder-right'/>
<div class='region-inner header-inner'>
<b:section class='header header-left' id='header' maxwidgets='1' showaddelement='no'>
<b:widget id='Header1' locked='true' title='Blog's Title (Header)' type='Header'/>
</b:section>
<div style='clear:both;'/>
</div>
</div>

Remember that "Blog's Title" is referred to the title of your blog.

Step 5: Save your template and view your blog. You have successfully added your logo to header and resized it to logo size. To recheck, on placing the cursor over the header, you will find that the whole header in not clickable, instead it’s your logo only.

How to Add Extra Gadget/Widget Section to Blogger Header


Let’s go one step forward and add an extra gadget section within Blogger header in new template designers. Within this gadget section you can add anything that you may want, for example, subscribe buttons, search box, Pages links list (navigation bar) or your AdSense ads.

Step 1: Go to Design > Edit HTML tab and backup your template.

Step 2: Find for the below code which you have edited and implemented in previous tutorial:

<div class='fauxborder-left header-fauxborder-left'>
<div class='fauxborder-right header-fauxborder-right'/>
<div class='region-inner header-inner'>
<b:section class='header header-left' id='header' maxwidgets='1' showaddelement='no'>
<b:widget id='Header1' locked='true' title='Blog's Title (Header)' type='Header'/>
</b:section>
<div style='clear:both;'/>
</div>
</div>

  Now find for <div style='clear:both;'/>  which is marked in red in above code and before it add:


<b:section class='header-right crosscol' id='header-right' maxwidgets='1' showaddelement='yes'/>

  So the full code will be:

<div class='fauxborder-left header-fauxborder-left'>
<div class='fauxborder-right header-fauxborder-right'/>
<div class='region-inner header-inner'>
<b:section class='header header-left' id='header' maxwidgets='1' showaddelement='no'>
<b:widget id='Header1' locked='true' title='Blog's Title (Header)' type='Header'/>
</b:section>
<b:section class='header-right crosscol' id='header-right' maxwidgets='1' showaddelement='yes'/>
<div style='clear:both;'/>
</div>
</div>

Step 3: Find ]]></b:skin> and before it add the following CSS:


.header-right {
display:inline-block;
float:right;
width:400px;
}

Now all is left is to change the width that are marked in bold. Increase or decrease the pixels according to your needs and positioning new header section.

Step 5: Save your template. Go to Design > Page Elements tab and from there you can add a new gadget to the newly created extra header section in Blogger. You may find that the extra gadget section is created just under your Blogger header as shown in the image below.

New gadget section beside blogger header

Click to enlarge

Wednesday, May 2, 2012

Add 125x125 Ad Slots To Your Blogger


Presently 125x125 ad-spots are the most famous ad dimensions in the blogosphere. For both publishers and advertisers these dimensions are perfect to display text & pictures attractively and at the same time these ads do not interfere much with the blog's content.
So if you are too planning to sell some place on your blog with these 125x125 ad spots, then follow these simple instructions:


STEP 1:
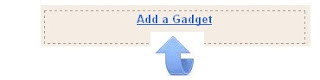
Log in to Blogger, go to "Layout", and click on "Add a Gadget" -> select it as "HTML/JavaScript".
Paste this code into the HTML box:


<center><table border="0"><tr>
<th width="126" height="126" align="center"><img src="http://i44.tinypic.com/2v97vv9.jpg"/></th>
</tr><tr>
<td width="126" height="126" align="center"><img src="http://i44.tinypic.com/2v97vv9.jpg"/></td>
</tr></table></center>


The code in blue represents "no. of columns" (2 blue lines=2 columns) and code in purplerepresents "no. of rows" (2 purple lines=2 rows).

STEP 2:
Save the widget.

STEP 3:
As soon as an advertiser approaches you, replace the links in RED in the code above with the new ads.


TIP: Instead of showing all 4 banners as "Advertise Here", it is better to use 2 or 3 of them to show any affiliate ads and keep the last one as "Advertise Here" banner.

Add Different Color Falling Snow Flakes To Blogger


 Friends,This post about adding different color falling snow flakes to your blogger. follow this post.


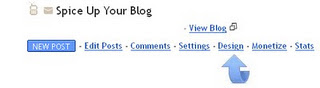
  • In your dashboard Click Design > Add A Gadget > Choose Html/Javascript


  • Copy And Paste The Code Below Into The Html/Javascript Gadget :


<a href='http://www.entertainer001.tk/'><img alt='Tricks &Hacks' src='https://blogger.googleusercontent.com/img/b/R29vZ2xl/AVvXsEiF-OZuobLnre2Mtm5ElYjjB6coN7oRJlV2ty5wBaw2vDqOlFFJNxb_D2rkye51AwmEPiK5O4RhW2jMvXp1kAztz5nfaNLeHihrOKRGkT81XAUSAeH1tuHculxiRzrfefaM2dEF7TH-DdxH/s1600/best+blogger+tips.png'/></a><script type='text/javascript'>
//Snow - http://www.btinternet.com/~kurt.grigg/javascript
if ((document.getElementById) &&
window.addEventListener || window.attachEvent){
(function(){
//Configure here.
var num = 40; //Number of flakes
var timer = 30; //setTimeout speed. Varies on different comps
var enableinNS6 = 1 //Enable script in NS6/Mozilla? Snow animation could be slow in those browsers. (1=yes, 0=no).
//End.
var y = [];
var x = [];
var fall = [];
var theFlakes = [];
var sfs = [];
var step = [];
var currStep = [];
var h,w,r;
var d = document;
var pix = "px";
var domWw = (typeof window.innerWidth == "number");
var domSy = (typeof window.pageYOffset == "number");
var idx = d.getElementsByTagName('div').length;
if (d.documentElement.style &&
typeof d.documentElement.style.MozOpacity == "string")
num = 12;
for (i = 0; i < num; i++){
sfs[i] = Math.round(1 + Math.random() * 1);
document.write('<div id="flake'+(idx+i)+'" style="position:absolute;top:0px;left:0px;width:'
+sfs[i]+'px;height:'+sfs[2]+'px;background-color:red;font-size:'+sfs[2]+'px"><\/div>');
currStep[i] = 0;
fall[i] = (sfs[i] == 1)?
Math.round(2 + Math.random() * 2): Math.round(3 + Math.random() * 2);
step[i] = (sfs[i] == 1)?
0.05 + Math.random() * 0.1 : 0.05 + Math.random() * 0.05 ;
}
if (domWw) r = window;
else{
if (d.documentElement &&
typeof d.documentElement.clientWidth == "number" &&
d.documentElement.clientWidth != 0)
r = d.documentElement;
else{
if (d.body &&
typeof d.body.clientWidth == "number")
r = d.body;
}
}
function winsize(){
var oh,sy,ow,sx,rh,rw;
if (domWw){
if (d.documentElement && d.defaultView &&
typeof d.defaultView.scrollMaxY == "number"){
oh = d.documentElement.offsetHeight;
sy = d.defaultView.scrollMaxY;
ow = d.documentElement.offsetWidth;
sx = d.defaultView.scrollMaxX;
rh = oh-sy;
rw = ow-sx;
}
else{
rh = r.innerHeight;
rw = r.innerWidth;
}
h = rh - 2;
w = rw - 2;
}
else{
h = r.clientHeight - 2;
w = r.clientWidth - 2;
}
}
function scrl(yx){
var y,x;
if (domSy){
y = r.pageYOffset;
x = r.pageXOffset;
}
else{
y = r.scrollTop;
x = r.scrollLeft;
}
return (yx == 0)?y:x;
}
function snow(){
var dy,dx;
for (i = 0; i < num; i++){
dy = fall[i];
dx = fall[i] * Math.cos(currStep[i]);
y[i]+=dy;
x[i]+=dx;
if (x[i] >= w || y[i] >= h){
y[i] = -10;
x[i] = Math.round(Math.random() * w);
fall[i] = (sfs[i] == 1)?
Math.round(2 + Math.random() * 2): Math.round(3 + Math.random() * 2);
step[i] = (sfs[i] == 1)?
0.05 + Math.random() * 0.1 : 0.05 + Math.random() * 0.05 ;
}
theFlakes[i].top = y[i] + scrl(0) + pix;
theFlakes[i].left = x[i] + scrl(1) + pix;
currStep[i]+=step[i];
}
setTimeout(snow,timer);
}
function init(){
winsize();
for (i = 0; i < num; i++){
theFlakes[i] = document.getElementById("flake"+(idx+i)).style;
y[i] = Math.round(Math.random()*h);
x[i] = Math.round(Math.random()*w);
}
snow();
}
if (window.addEventListener){
window.addEventListener("resize",winsize,false);
window.addEventListener("load",init,false);
}
else if (window.attachEvent){
window.attachEvent("onresize",winsize);
window.attachEvent("onload",init);
}
})();
}//End.
</script><a href="http://www.masterhacksindia.blogspot.com/" target="_blank">Snow Fall Blog Gadget</a>
 
(You don't need to give the gadget a title just leave title area blank)

 
  • Save The Gadget and check out your cool snow Effect.


 Comment below ..............................


Christmas Snow Falling Effect For Blogger Blogs

In this post we have a very cool effect you can use to Spice Up Your Blog over the Christmas.With just a small piece of code you have Snow Flakes gen
tly falling down your blog.The Snow Fall effect we use is simple and wont disrupt the readers.
Adding the effect is easy and can be done in a few quick steps:


  •   In your dashboard Click Design > Add A Gadget > Choose Html/Javascript


  •   Copy And Paste The Code Below Into The Html/Javascript Gadget :

<a href='http://www.masterhacksindia.blogspot.com/2012/05/christmas-snow-falling-effect-for_02.html'><img alt='Tricks&Hacks' src='https://blogger.googleusercontent.com/img/b/R29vZ2xl/AVvXsEiF-OZuobLnre2Mtm5ElYjjB6coN7oRJlV2ty5wBaw2vDqOlFFJNxb_D2rkye51AwmEPiK5O4RhW2jMvXp1kAztz5nfaNLeHihrOKRGkT81XAUSAeH1tuHculxiRzrfefaM2dEF7TH-DdxH/s1600/best+blogger+tips.png'/></a><script src="http://snow-effect.googlecode.com/files/snow.js" type="text/javascript">
/************************************************ Snow Effect without images-by Kurt Grigg at http://www.btinternet.com/~kurt.grigg/javascript * Script featured available at Dynamic Drive at http://www.dynamicdrive.com/ * Please keep this notice intact ***********************************************/
</script><a href='http://www.masterhacksindia.blogspot.com/2012/05/christmas-snow-falling-effect-for_02.html'  target="_blank"><font size="1">Get snow effect</font></a>


(You don't need to give the gadget a title just leave title area blank)


  •   Save The Gadget and check out your cool snow Effect.


Direct Cut Images From Your Screen And Paste In PNG or BiTMP(Screen Cut Software)

In your regular practice First you press "Print screen button" then paste image in Paint Cut Actual required Image ,Convert it into PNG Or Sometimes compress it .And Then Upload it.Shhhess This very Long Long Process . Now i going to Share with you a Very Cool Software .


Features:
1) Images Size Difference is very large, Usually 300kb By using this software its Only of 34kb(200*200 picture)
2)Image extension is PNG which is widely used, uploaded and can be edited online.
3) Easy to use
4) No Compromise With Image Quality.
Requirements

You must have .Net Framework installed On your computer.
Procedure to use this software.

1# Step

Install Software

2# Step
Run Application.After starting you will see small butterfly icon below Right hand side of the screen

screen-cut

3# Step
Then Right Click on it to change options To change selection area(Free hand or Rectangle) And Change format Png or BitMP. I am using PNG it gives quality picture of very small size.
Add Image


screen-cut2


screen-cut3


4# Step
To start double click on the icon.After clicking whole screen will Become Grey in color.Now select your Space or Area on screen to CUT .Then Go on Desktop And Paste the Selected Image.

Here is the Download Link (Download)

Brought by http://www.atalasoft.com